We were inspired by River Cottage Everyday which was on telly the other night. Ava saw them making bread and suggested it would be great activity to do together. So, on Saturday we had a go. It's quite lovely and very simple. The crust is very crisp and crunchy and it's quite similar to an Italian style loaf.
It's just four simple ingredients. Some kneading and resting of the dough and then the baking.
The ingredients are;
- 1 kg flour
- 10 grams yeast
- 15 grams salt
- 600 mls warm water
Measure the dry ingredients into a large bowl and add the warm water. Mix with your hands until it comes together in a sticky ball.
Then start to knead for about 10 minutes. It's quite a relaxing process - good thinking time!
and a bit of an arm workout!
Once the dough is smooth and stretchy, shape it into a ball by rolling it between the outside of your hands
Then place into an oiled bowl
cover with cling film and leave to rise in a warm place until doubled in size - about one and half hours
Once risen, tip out of the bowl and knock back by pressing your fingertips into the dough until well flattened. Then split the dough into two pieces and shape each into your desired shape. I did another ball shape. Place on a well floured board and cover with a damp tea towel. Leave to rise again in a warm spot for about 45 minutes.
Preheat a large baking sheet in a hot oven.
Once your loaves have risen, slash the tops with a sharp knife to give extra room for rising and place them very carefully onto your preheated and well floured baking sheet (no oil necessary) and back into the oven.
Bake for about 40 minutes in a hot oven until well browned and the loaves sound hollow when tapped.
Enjoy the same day, warm with butter - it's really, really good!
Ava took all the photo's for this post - except the one of herself! We were slightly sidetracked at the second rising stage, so apologies for the lack of photo's there!
Happy baking!
Showing posts with label tutorial. Show all posts
Sunday, 1 April 2012
Monday, 27 February 2012
Making Butter
We had a go at making butter the other day. There were several cartons of good quality cream reduced to clear at the supermarket, so we took the opportunity and bought all six of them! We found a good recipe to follow in this book.
Making butter was easier than I initially thought. Just pour in the cream and let the mixer do the rest!
It takes a while for the cream to separate...........
Then as soon as the buttermilk and butter separate, put the butter into a sieve lined with muslin to drain a little more squeezing the buttermilk out by hand.
Then back into the mixer for another brief stint of whipping to get the last of the buttermilk out
Back into the sieve lined with fresh muslin for the final drain (see all the buttermilk in the jug!)
However, it was a little fiddly when it came time to shape the butter with the butter pats (these were my grandma's I think). There is definitely an art to it.
and voila, homemade butter!
We made seven 220gram parcels all together
We have frozen most of the parcels as the recipe suggests that homemade butter doesn't last as long as the shop bought stuff. The buttermilk made lovely pancake batter too.
Our butter was lovely spread on homemade bread with lunch. We will certainly make this again!
Wednesday, 30 November 2011
Lemon Cordial Tutorial
It's been quite a while since we last bought cordial from the supermarket - at least 2 years I'd say. Once we found this recipe for homemade lemon cordial, there was no going back! Aside from the fact that this tastes so much better than the bought stuff, you know exactly what's going into it - no artificial colours, flavours or weird numbered additives.
Over time, I've adjusted the amount of sugar in this recipe - there is quite a strong sugar syrup as the basis for this cordial - but you use so little and dilute it with water, so it's not so bad really! It contains far less sugar when compared to the supermarket stuff.
This is a staple in our house. Phil isn't a huge fan of drinking water without some kind of flavouring! You can adapt this to include any kind of citrus fruit, but we like lemons the best.
You will need:
- 1400 grams of sugar
- grated rind and juice of 8 lemons
- 1100 mls boiling water
- 1 tablespoon citric acid
Finely grate the rind of the lemons.
Then juice all 8 lemons.
Measure out the sugar into a large heatproof bowl.
Add the citric acid to the sugar.
Pour the boiling water over the sugar and citric acid mix.
Add the finely grated lemon rind.
Stir thoroughly until the sugar is completely dissolved.
Then pour in the lemon juice and stir again.
Cover the bowl and leave to stand overnight or for several hours. The longer you leave it, the stronger the lemony tang!
The next morning, strain the mixture and pour into sterilised glass bottles. Keep in a cool dark place. Once opened, keep it in the fridge.
Enjoy!
Monday, 7 November 2011
Home Made Broad Bean Pesto
Our broad beans have been growing quite nicely. We thought the flowers were pretty and the beans would be along fairly soon, but upon further investigation, we found lots of pods ready for picking which was a surprise!
So, we decided to make one of our favourites from this book, Broad Bean Pesto. It's so simple, and everyone loves it. It's milder and creamier than regular pesto made with basil and it takes about 5 minutes to make (once you have podded the beans!)
You will need salt, pepper, 200 grams of fresh broad beans - podded, 2 handfuls torn basil leaves, 3 tablespoons of pine nuts, 5 teaspoons of extra virgin olive oil, 100 grams of freshly grated parmesan cheese. These ingredients will make enough pesto for about 500 grams of pasta.
Place all ingredients in the blender and blend until smooth. Or, if you want to be more authentic, you can use a mortar and pestle!
Cook up your pasta and reserve a couple of tablespoons of the cooking water to loosen your pesto if necessary.
We enjoyed ours with homemade pasta.
Bon appetito!
Wednesday, 26 October 2011
Homemade Ice-cream
Ava and I decided to spend some time in the kitchen this morning. We made the usual loaves of bread, but felt we needed something more decadent. I have been spending some time looking through this book lately and have been keen to try out some of the recipes. It's a really beautiful book and covers many topics including dairy, breads, preserving, vegetables herbs and salad, meat and foraging among many others. The recipes are based on 'real' ingredients and are simple and easy to follow.
So we chose the 'Ballymalloe Vanilla Ice-cream' to make today. It was quite simple to make.
All we needed was 4 egg yolks, 5 cups of softly whipped cream, half a cup of sugar, 1 teaspoon of vanilla extract and a vanilla bean with its seeds scraped out.
Whisk the cream until softly whipped
Then whisk the egg yolks until light and fluffy
Stir to dissolve the sugar in a cup of water over low heat. Then bring to the boil (I did this bit by myself as I'm wary of boiling sugar with little one's around!) and simmer away until it reaches syrupy consistency - about 230 degrees Fahrenheit.
Whilst whisking, add the syrup, (very carefully so you don't touch the sides of the bowl with the syrup as it will solidify) in a thin stream. Add the vanilla extract and seeds from the vanilla pod and beat until it reaches a creamy white, mousse-like consistency.
Then fold in the whipped cream
A put into a bowl or container that will fit in the freezer. Cover and freeze until set.
There's no need to whisk during the setting period, so it's really quite easy and less fiddly thank other ice cream recipes I have come across. The recipe does suggest that you remove it from the freezer 10 minutes prior to serving time to allow it to soften slightly.
We will have to see how it tastes for dessert tonight!
Bon Appetito!
Wednesday, 12 October 2011
Our Favourite Ragu Tutorial
After reading many blogs and really enjoying tutorial posts, I thought I'd give one a go myself, so hopefully this will all make sense and flow nicely!
One of the favourite meals at our house is pasta. Ava and Phil are particularly fond of my beef ragu which I often make to go with homemade pasta. I'm not a huge fan of meat, but I'll eat this pretty happily.
It's my take on the casserole that mum often used to make when we were growing up. Mine's a bit thicker and less 'saucy' than Mum's. I like to use my cast iron casserole pot to cook this in, as it seems to cook the sauce really beautifully.
You will need some time to make this. It's not as tasty if it's made in a rush. You need to make it with patience and love!!
So here we go!
You will need:
![]() |
| 1kg gravy beef diced into 1 inch cubes 1 large onion diced 2 medium carrots finely diced 2 sticks celery finely diced a large handful flat leaf parsley finely chopped 4 cloves garlic, crushed 1/2 - 1 cup white wine (depending upon your taste) 1 jar of Barilla tomato and basil sauce (or 440g tin of tomatoes) 1/2 teaspoon smoked paprika 1 teaspoon vegetable stock powder (I use Massell brand) 2 bay leaves 1 teaspoon brown sugarSalt & Pepper to taste flour to coat beef |
![]() |
| Roll beef cubes in flour to coat thoroughly. You can season the flour if you like. |
![]() |
| Brown beef cubes thoroughly in olive oil over a medium - high heat. Do this in batches, so there is plenty of room and the pan isn't over crowded. |
![]() |
| Gently sweat the onions, carrots, celery and parsley over a low heat for about 10 minutes. Stir occasionally and scrape the bits off the bottom of the pan as it cooks. This adds to the flavour! |
![]() |
| It should look like this once the veggie mixture is cooked sufficiently! |
![]() |
| Add the white wine and crushed garlic to the veggie mixture. Allow to simmer away and reduce by about a third. |
![]() |
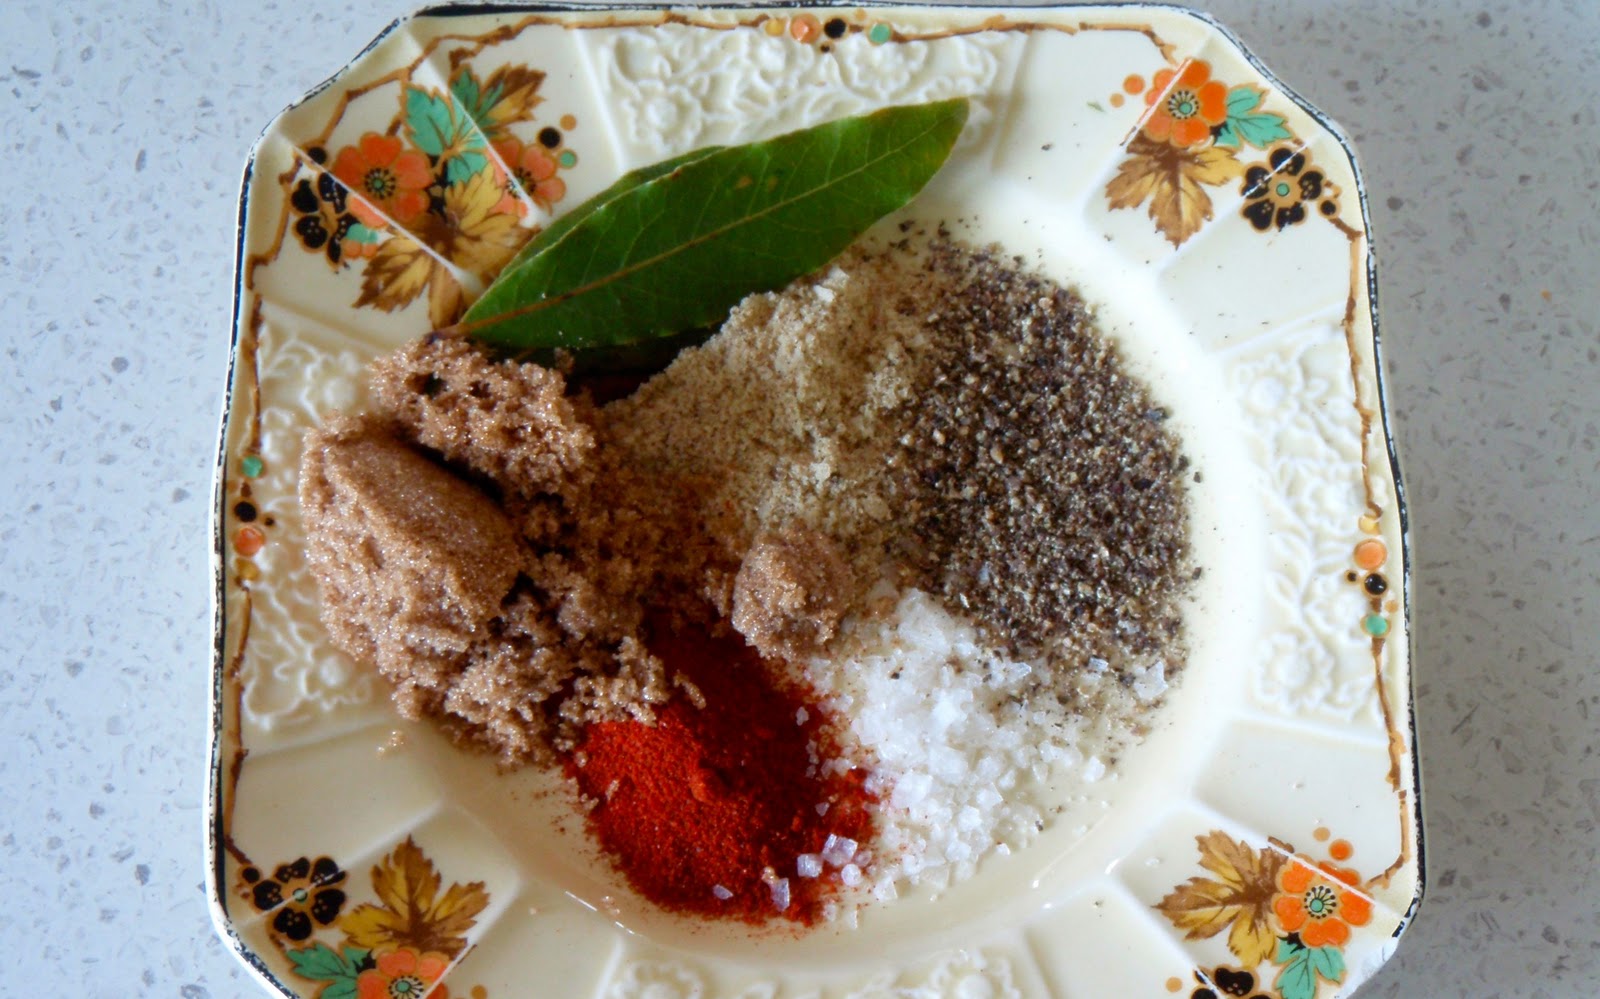
| Your seasonings - paprika, powdered stock, salt and pepper, brown sugar and bay leaves. |
![]() |
| Return browned meat to pan. |
![]() |
| Add tomato sauce |
![]() |
| refill jar to half full with water and add this too (if you're using tinned tomatoes half fill the can) |
![]() |
| Add seasonings |
![]() |
| Stir thoroughly |
![]() |
| Bring to the boil, stirring, and then reduce the heat to a very low simmer. |
![]() |
| Your finished Ragu over Homemade pasta - Bon Appetito! |
Subscribe to:
Posts (Atom)